Showing posts with label decorating. Show all posts

Saturday, January 5, 2013

Mr Bean

Mr Bean step by step...
My first attempt at sculpting a caricature. I chose Mr Bean coz he's one of my favourite characters and his face is full of expression. 

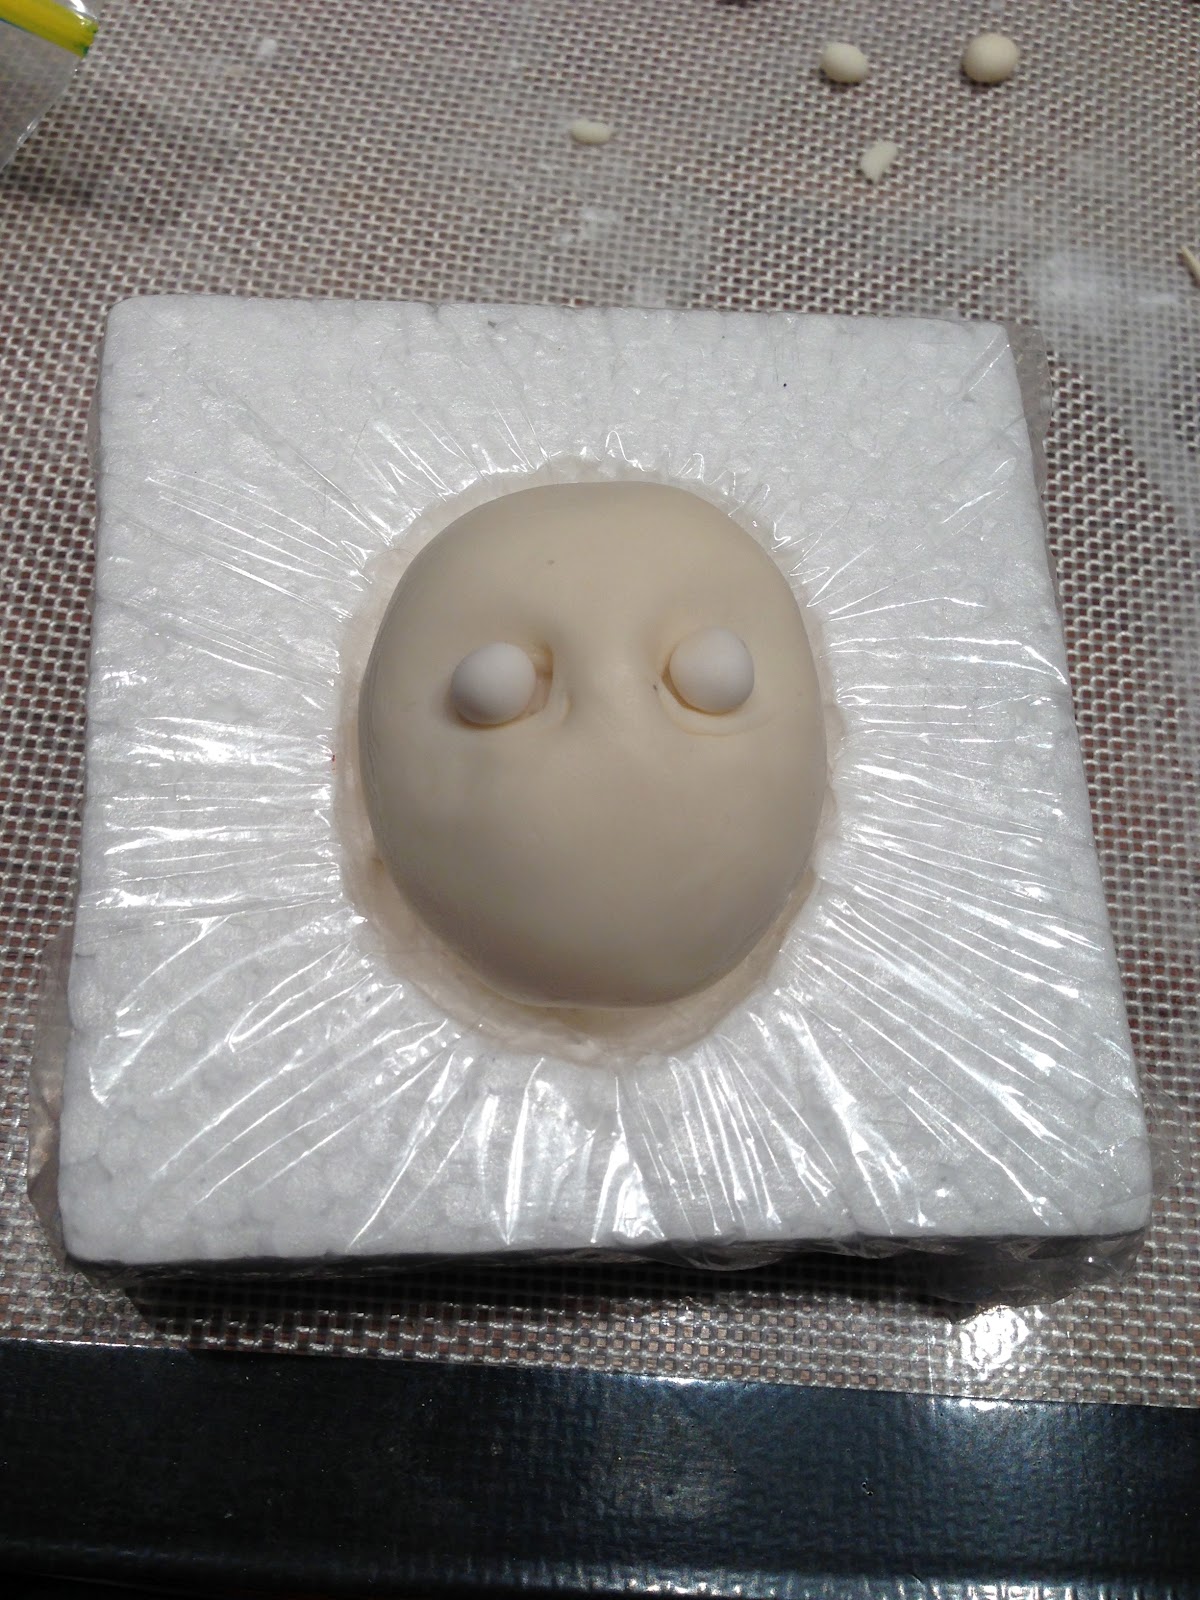
Step 1: Usual stuff, start with an egg-shaped ball of LCM, or RKT (rice krispie treats). I used half a bar of LCM coz I only needed a little. No point making a whole batch of RKT just for a little bit. Squish and shape LCM into an egg. Oh, do you like my new head moulding tool? 
Step 2: Cover LCM egg with fondant. For face sculpting, I find a mix of 50-50 white modelling chocolate and Satin Ice ivory fondant gives me the best texture. The modelling chocolate prolongs the working time of the fondant without drying out too quickly and the fondant prevents the modelling chocolate from getting too greasy from the heat of my fingers. All in all, a great marriage :-) Don't forget to indent two holes for the eye sockets.
Step 3: Make 2 small balls from white fondant for the eye balls. Make sure the eye balls fit in the eye sockets. Before proceeding to Step Four, leave the face and eye balls to dry out and firm up a little. This is a good time to catch up on some housework... or watch TV.... or have a nana nap (I chose the second and third option. Hehehe).
Step 4: Add eye lids. I ended up doubling the size of the eye balls to add a bit of drama and expression to Mr Bean's face.
Step 5: Form a nose and attach to the face with some tylose glue. 
Step 6: Add the cheeks.
Step 7: Blend the cheeks into the face. This is another reason why I add white modelling chocolate to fondant. It's easier to blend and smooth out the seams. Don't forget to etch out the mouth at this stage.
Step 8: Add lips and forehead. At this point I also etched out some details such as wrinkles and skin folds.
Step 9: Add pupils to the eyes. I simply used black non-pareils.
Step 10: Add eyebrows. Remember eyebrows play an integral part in facial expressions so give some thought about how to shape the eyebrows to get that expression you want to achieve. Don't forget to attach the ears!
Step 11: Finally, the hair and here's Mr Bean! A few things I'd like to have done better; make the forehead wider and higher, for example. And make better looking hair. But overall, quite happy with my first attempt. This head is rather large, almost the size of an egg. Next project is to make a smaller head which is more of a challenge to get all the details on a smaller scale. 
Bean! With a dash of colour...

Tuesday, November 6, 2012

Purple pig

This is my other weekend rush job. Got the cake order late Friday night, from Greg.... gotta love my hubby! This is the smallest 3D novelty I've made, it'll only feed like 4 people. LOL. This is coz Greg's taking it to Sydney on the red eyed special first up Monday. Can't even imagine him trying to balance a 3 or 4 tiered topsy turvy in the plane! Hahaha. So, the cake's gotta be small enough to fit in a shopping bag as hand luggage.
First thing's first... prepare foam core cake board. I secured bubble straws in the foam core and slip some fondant discs (slipped discs???) around the straws - these will be the pig's legs.
Greg carved the pig's belly from styrofoam, and there's the model pig in the background. It's a Smart Salary piggy bank... sorta like a corporate mascot I suppose. Purple not quite the right shade but since this is a rush job, I don't have time to play around with colours so I used Satin Ice purple fondant straight from the tub. As it turned out, the model piggy bank is the wrong shade of purple while my cake is very close to the official corporate purple... Yes, the marketing people at Smart Salary actually whipped out their colour charts and compared my pig.... awww......I'm touched!
My trusted Planet Cake white chocolate mud cake layered and covered in dark chocolate ganache.
Oink oink...
 Oink...
 The end!


Saturday, September 22, 2012

This cake more epic than the last!

If I thought the dolly cake was epic..... all I can say is, "Phew!" I couldn't wait to apply the skills I learned at Jo Binkin's 3D novelty cake class last weekend (thanks Latorta for organising the class), so this is my attempt at a 3D cake.... well, 2 cakes - the piggy is essentially a 3-tier cake carved into shape and the bottle is a small cake on its own, torted and carved into a bottle. 
25 fondant lace butterfly cupcakes to go with the birthday cake.
Dressing Little Miss Piggy. LOL...


Halfway dressing Little Miss Piggy, the TNT truck arrived with my new iPhone 5.... exciting!! Okay, Piggy will just have to wait while I rush off to the Optus shop to get a micro-SIM. The phone is so new that there are no accessories to go with it. Even the new Canberra Apple Store has yet to stock up on screen protectors and covers. Seriously contemplating making a makeshift cover out of bubble wrap, we spotted some screen protectors and phone covers at JB Hifi. Not much of a choice - only sunset yellow...yuck! Oh well, that'll do for now.
Putting off tinkering with my new phone, I finally finished Piggy. Here she is with her sunny daisy overalls and bottle of wine.
Add some butterflies...
All dressed up and off to Sydney she goes.
BTW, this is the cake I learned to make at Jo Binkin's class last weekend.


Wednesday, September 19, 2012

Uncle Bill's racing cake

A 90th birthday cake for Jo's uncle who likes horse racing. 
I make LCM shapes for the horses - head, body and legs.
Cover the shapes with fondant.
Assemble the body and leave it to harden overnight. My trusty silicone petit four mould to the rescue, as usual.
Next day I attach the heads and use paper towels to hold them in place. I then leave these for a few days to dry out and harden properly. This is necessary to ensure that the legs would support the weight of the body and head.
Add details. I pipe the hair and tail using a Makins clay extruder - used only for fondant. If you have a clay extruder that you've used for clay or polymer clay, you need to get a new one. I never mix food tools with non-food tools. The same goes for brushes and other equipment.
Don't forget to make 2 holes for the nostrils.
For the ears, start with 2 small teardrops.
Make a line indent on each teardrop.
Attach the ears.
I cut a cardboard cake board into a rectangular shape and cover with green fondant. I make railings out of toothpicks covered in white fondant.
Fine details are added - jockey complete with boots and caps and a fallen jockey adds to the drama.
Final cake is quite different from what I've originally planned! I initially thought of a rectangular cake iced with buttercream (Jo wanted the most simple flavours) and covered with green tinted desiccated coconut, topped with the horses and race track. But when I completed the topper, I realised I didn't have a cake box large enough for a rectangular cake. So, the cake design was converted from rectangular to round. Can't take credit for the design, though coz I found heaps of cakes like this on google. BUT, I can take credit for the fallen jockey idea! LOL.


Friday, August 31, 2012

Mudslide

I made a chocolate mud cake with chocolate ganache for work morning tea to celebrate the end of 2 excruciating months of monitoring reporting. It's a 6-monthly monitoring report so just as we finished, it's time to start the next.... oh dear! This cake stemmed from my innate Catholic guilt coz everyone in my team worked hard on the report.... everyone, except me... haha. So, to make my team (and mainly myself) feel better about my lack of involvement, I whipped this cake together in record time. Unlike the epic cake, this was put together overnight and as you can see, it's very sloppy work. Actually, it was worse coz I had chocolate ganache everywhere but hubby Greg wouldn't let me take a photo until he cleaned up the mess. 


The farm sinking in the mudslide has special significance for our work team, especially the sliding chooks. In the course of our work, we have to deal with very demanding stakeholders, so the chooks and the farmer and the farmer's wife sorta represent these stakeholders. Hahaha.... great stress reliever, I'd say. It's a stress reliever for me to make them and a stress reliever for my team mates to eat them. This is what we call a win-win situation. The barn and chooks are sculpted from my favourite Kellogg's LCM breakfast bars and covered with fondant - I think it's time Kellogg's contact me for sponsorship (hint, hint!).


Bloggers.com

Bloggers - Meet Millions of Bloggers