Showing posts with label gum paste. Show all posts

Saturday, September 28, 2013

Catching up!

I haven't posted in a while. Been a busy year. Don't know where to begin so I'll start with my latest bobblehead - here's Slash made for Noah's personal groomer's birthday.


Tuesday, November 6, 2012

Purple pig

This is my other weekend rush job. Got the cake order late Friday night, from Greg.... gotta love my hubby! This is the smallest 3D novelty I've made, it'll only feed like 4 people. LOL. This is coz Greg's taking it to Sydney on the red eyed special first up Monday. Can't even imagine him trying to balance a 3 or 4 tiered topsy turvy in the plane! Hahaha. So, the cake's gotta be small enough to fit in a shopping bag as hand luggage.
First thing's first... prepare foam core cake board. I secured bubble straws in the foam core and slip some fondant discs (slipped discs???) around the straws - these will be the pig's legs.
Greg carved the pig's belly from styrofoam, and there's the model pig in the background. It's a Smart Salary piggy bank... sorta like a corporate mascot I suppose. Purple not quite the right shade but since this is a rush job, I don't have time to play around with colours so I used Satin Ice purple fondant straight from the tub. As it turned out, the model piggy bank is the wrong shade of purple while my cake is very close to the official corporate purple... Yes, the marketing people at Smart Salary actually whipped out their colour charts and compared my pig.... awww......I'm touched!
My trusted Planet Cake white chocolate mud cake layered and covered in dark chocolate ganache.
Oink oink...
 Oink...
 The end!


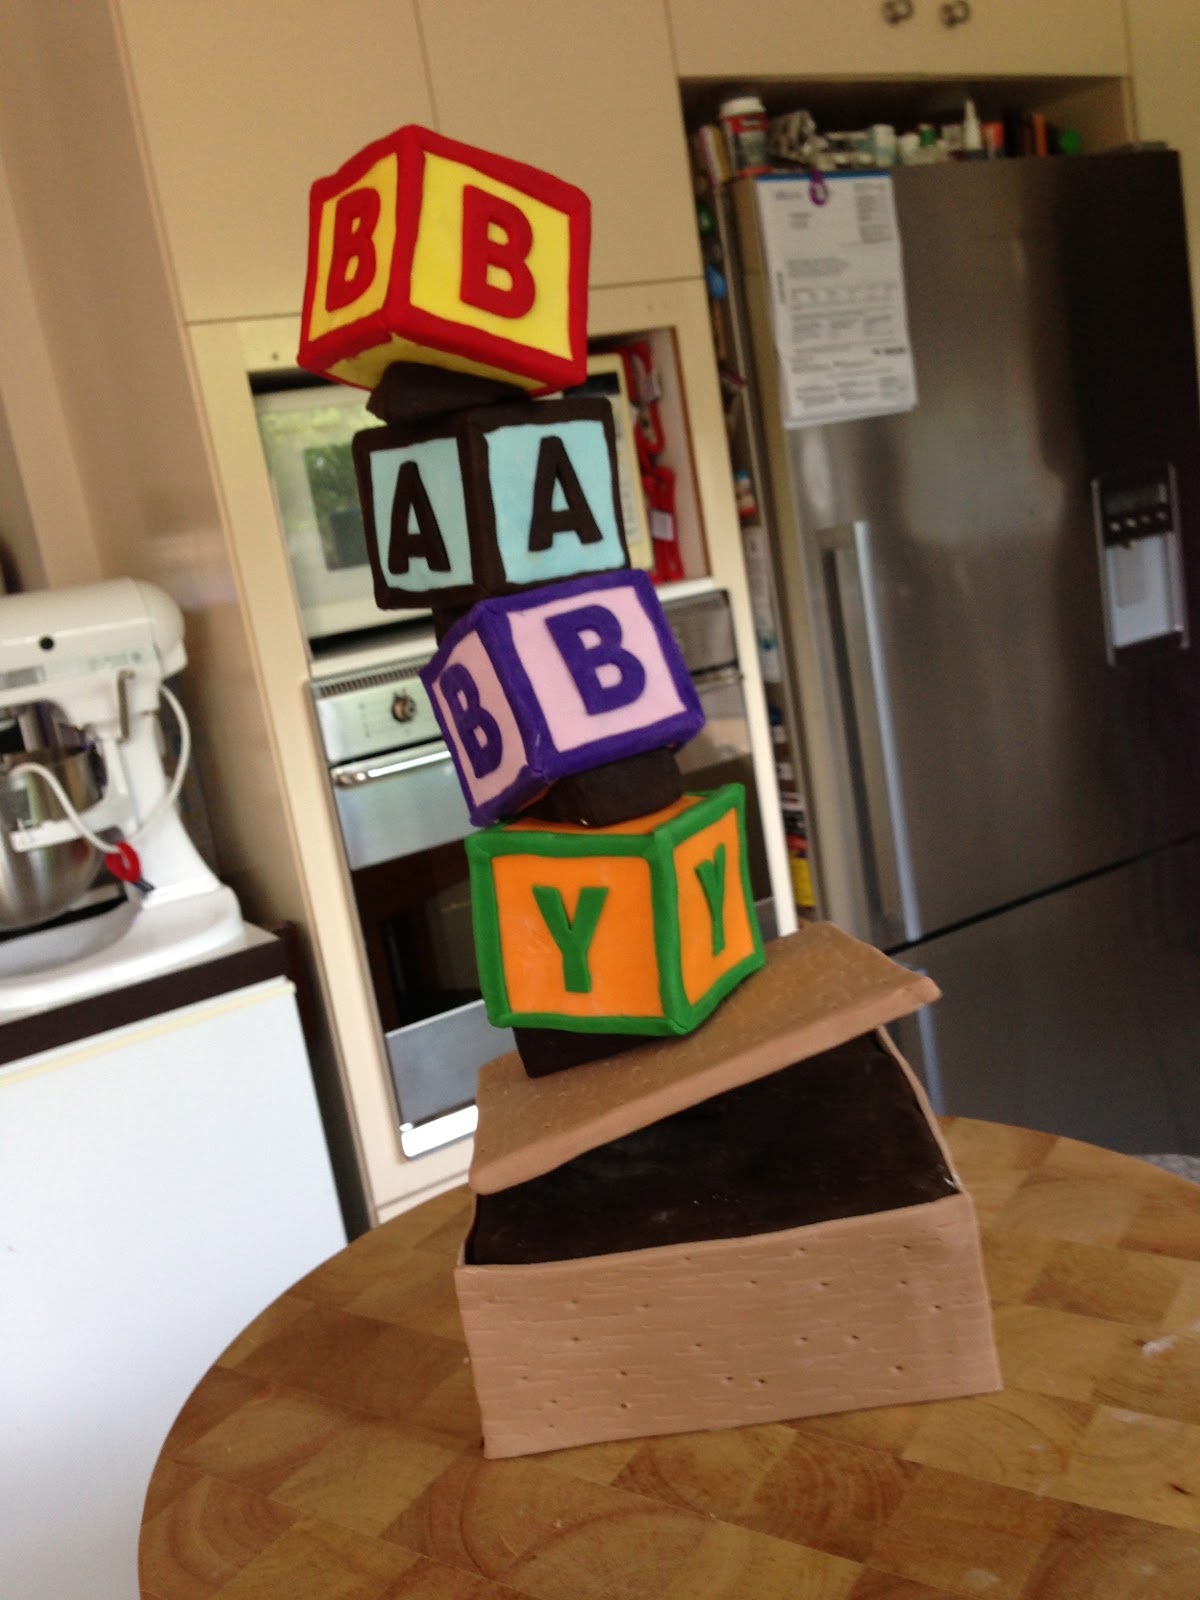
Oh baby!

Two pregnant workmates, both due about the same time. So thought I'd try another topsy turvy, and this one is more topsy than my first attempt with the teapot. First, concept drawing using my iPad Autodesk Sketchbook Pro app. Love the app coz it works in layers. First layer is the base cake which is the toy box and teddy. Second layer the alphabet blocks. This way, if the topsy turvy doesn't work, I don't have to erase everything and start over; I simply erase the second layer and do the blocks again.
Toy box cake is a 6" square orange Madeira sponge, layered and covered with dark chocolate ganache. I cut out fondant rectangles to size and made some wood impressions.
Same thing with alphabet blocks in various colours.

Test out the angles...
Would have loved to add more toys and details but I had 2 novelty cakes to make that weekend, so it was quite a rush job.
Oh well, still got eaten!

Saturday, September 22, 2012

This cake more epic than the last!

If I thought the dolly cake was epic..... all I can say is, "Phew!" I couldn't wait to apply the skills I learned at Jo Binkin's 3D novelty cake class last weekend (thanks Latorta for organising the class), so this is my attempt at a 3D cake.... well, 2 cakes - the piggy is essentially a 3-tier cake carved into shape and the bottle is a small cake on its own, torted and carved into a bottle. 
25 fondant lace butterfly cupcakes to go with the birthday cake.
Dressing Little Miss Piggy. LOL...


Halfway dressing Little Miss Piggy, the TNT truck arrived with my new iPhone 5.... exciting!! Okay, Piggy will just have to wait while I rush off to the Optus shop to get a micro-SIM. The phone is so new that there are no accessories to go with it. Even the new Canberra Apple Store has yet to stock up on screen protectors and covers. Seriously contemplating making a makeshift cover out of bubble wrap, we spotted some screen protectors and phone covers at JB Hifi. Not much of a choice - only sunset yellow...yuck! Oh well, that'll do for now.
Putting off tinkering with my new phone, I finally finished Piggy. Here she is with her sunny daisy overalls and bottle of wine.
Add some butterflies...
All dressed up and off to Sydney she goes.
BTW, this is the cake I learned to make at Jo Binkin's class last weekend.


Wednesday, September 19, 2012

Uncle Bill's racing cake

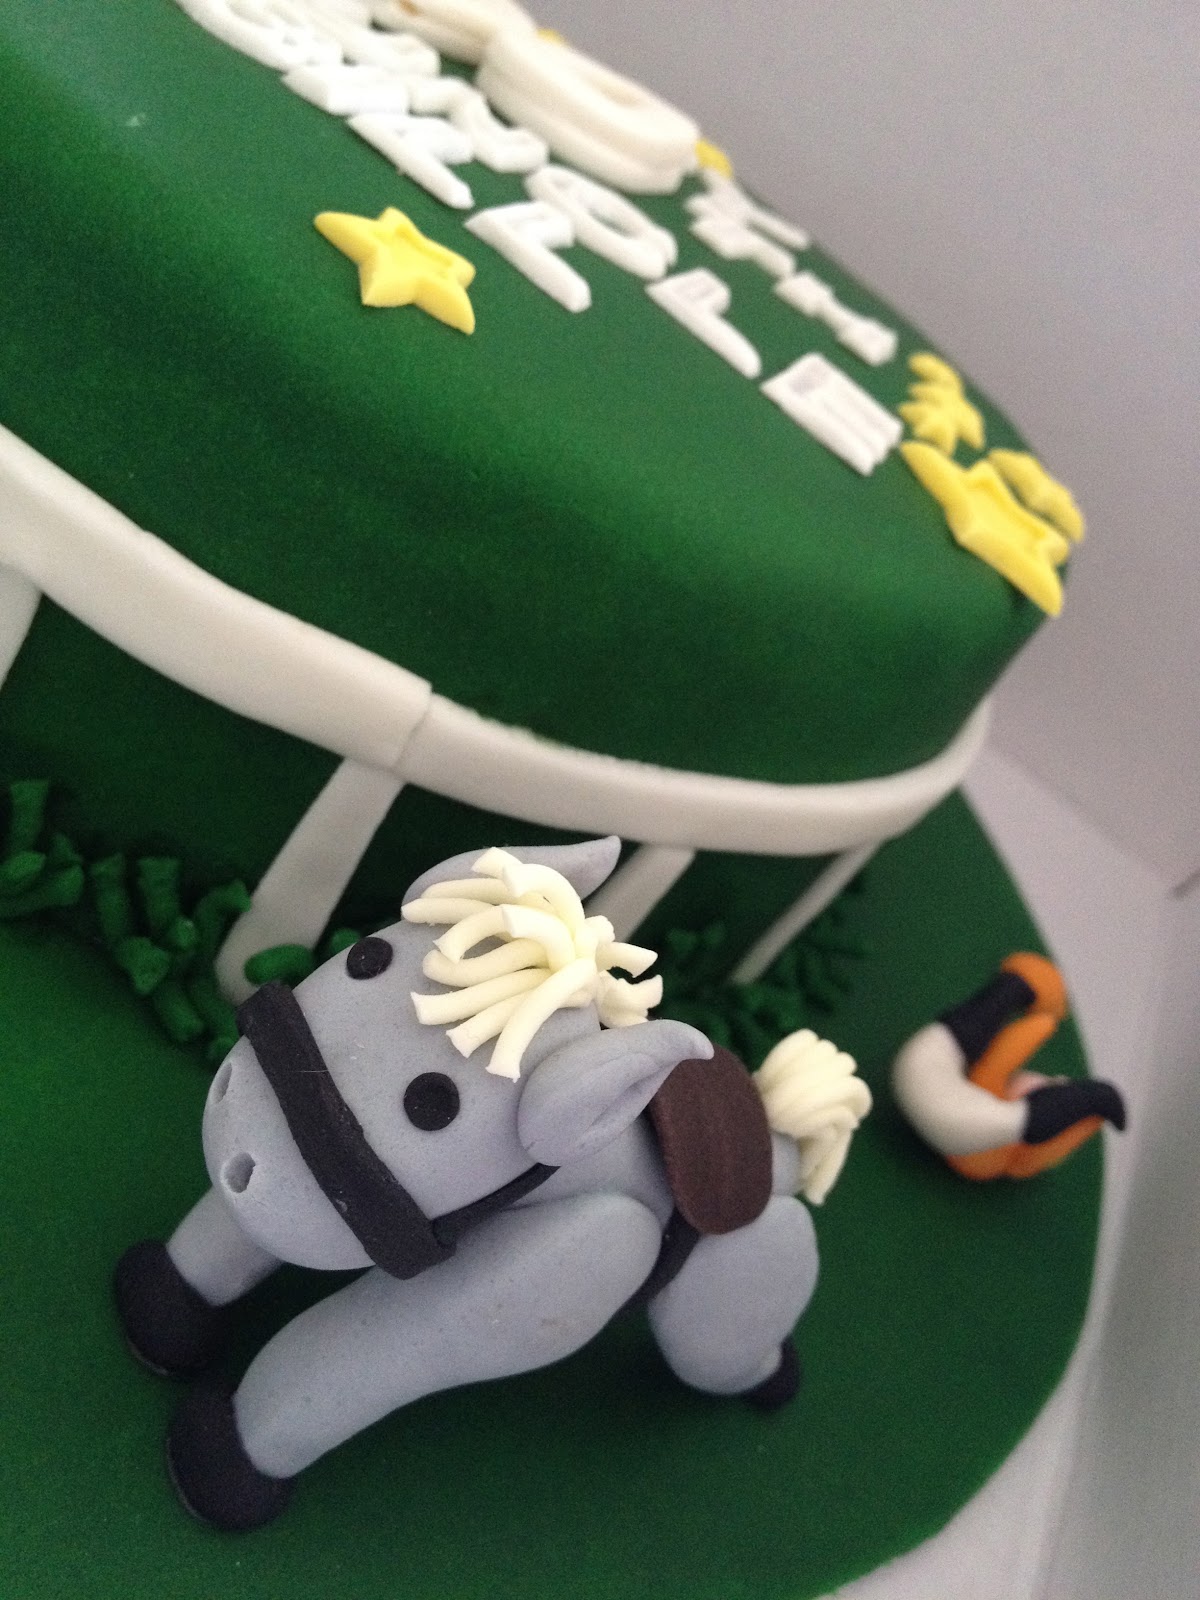
A 90th birthday cake for Jo's uncle who likes horse racing. 
I make LCM shapes for the horses - head, body and legs.
Cover the shapes with fondant.
Assemble the body and leave it to harden overnight. My trusty silicone petit four mould to the rescue, as usual.
Next day I attach the heads and use paper towels to hold them in place. I then leave these for a few days to dry out and harden properly. This is necessary to ensure that the legs would support the weight of the body and head.
Add details. I pipe the hair and tail using a Makins clay extruder - used only for fondant. If you have a clay extruder that you've used for clay or polymer clay, you need to get a new one. I never mix food tools with non-food tools. The same goes for brushes and other equipment.
Don't forget to make 2 holes for the nostrils.
For the ears, start with 2 small teardrops.
Make a line indent on each teardrop.
Attach the ears.
I cut a cardboard cake board into a rectangular shape and cover with green fondant. I make railings out of toothpicks covered in white fondant.
Fine details are added - jockey complete with boots and caps and a fallen jockey adds to the drama.
Final cake is quite different from what I've originally planned! I initially thought of a rectangular cake iced with buttercream (Jo wanted the most simple flavours) and covered with green tinted desiccated coconut, topped with the horses and race track. But when I completed the topper, I realised I didn't have a cake box large enough for a rectangular cake. So, the cake design was converted from rectangular to round. Can't take credit for the design, though coz I found heaps of cakes like this on google. BUT, I can take credit for the fallen jockey idea! LOL.


Friday, August 31, 2012

Cupcake Day is round the corner

Due to the frantic monitoring report, we've deferred our RSPCA Cupcake Day till Monday, 3 Sept. We have cupcake orders totalling 200. Emma and Alex are busy baking cupcakes this weekend and I've prepped the cake boxes all ready for cupcake deliveries on Monday, my 200 fondant puppies are ready to leave home.... awww..... (sniff!)


Mudslide

I made a chocolate mud cake with chocolate ganache for work morning tea to celebrate the end of 2 excruciating months of monitoring reporting. It's a 6-monthly monitoring report so just as we finished, it's time to start the next.... oh dear! This cake stemmed from my innate Catholic guilt coz everyone in my team worked hard on the report.... everyone, except me... haha. So, to make my team (and mainly myself) feel better about my lack of involvement, I whipped this cake together in record time. Unlike the epic cake, this was put together overnight and as you can see, it's very sloppy work. Actually, it was worse coz I had chocolate ganache everywhere but hubby Greg wouldn't let me take a photo until he cleaned up the mess. 


The farm sinking in the mudslide has special significance for our work team, especially the sliding chooks. In the course of our work, we have to deal with very demanding stakeholders, so the chooks and the farmer and the farmer's wife sorta represent these stakeholders. Hahaha.... great stress reliever, I'd say. It's a stress reliever for me to make them and a stress reliever for my team mates to eat them. This is what we call a win-win situation. The barn and chooks are sculpted from my favourite Kellogg's LCM breakfast bars and covered with fondant - I think it's time Kellogg's contact me for sponsorship (hint, hint!).


Monday, August 20, 2012

Epic!

"As God is my witness, I'll never be hungry again!"


Just like Gone With the Wind, this cake is epic! It's a 4-day saga.


Day 1, Thursday: Bake the cake. It's a super rich and dense chocolate mud cake from my Planet Cake book. Check out the super rich dark Lindt chocolate, 70% cocoa. Add to that, another 50gms of decadent Koko Black cocoa powder, eggs, and only a smidgen of flour but almost half a kilo of caster sugar! This is no cake. This is chocolate, pure and simple! By the end of Day 1, my house smells like a chocolate factory! Eat your heart out, Willy Wonka!


As if that's not enough of chocolate, add a layer of Darel Lea dark rocky road filling!


Day 2, Friday: Get 1.3kg of premium white chocolate... no, it's not a typo. It really was 1.3 KILOS!


Melt white choc with pure cream to get a smooth ganache. Slice the cake in half, fill with ganache and chopped rocky road. Sandwich cake together and leave to set overnight.


Day 3, Saturday: Ice the cake with white chocolate ganache prepared the day before. This is where hubby's cement rendering skills come in really handy...


Make sure the ganache is as smooth as a baby's bottom, or in this case, a mother's boob. LOL. Leave to harden overnight.


Day 4, Sunday: Decorate, decorate, decorate. Start with dressing up the gown in fondant...


It helps to make a template first. I basically use the template to create panels of the gown and attach them one panel at a time. This is because I simply don't have a rolling pin large enough to roll out a giant circle for the entire gown.


Add the doll, finish off the rest of the gown and accessorise. Doll's hair styled courtesy of Emma Walsh. Thank you so much for doing such a great job. When I first asked Emma to style her hair, she thought it was the weirdest request she's ever received. Emma is a qualified hairstylist and has done a lot of hair but never a dolly's hair. Still, she gave it her best and look at how glamorous she made my dolly.


Thanks to hubby, Greg for the great job in piping these royal icing flowers!


Day 5, Monday: A cake is meant to be eaten so Dolly's minutes are definitely numbered!


 Bring out the knife!


Attack!!


"I'll definitely not be hungry after eating you!" says the Birthday girl, Emma Wright.


BU-WAHAHAHAHA.......


First slice off Dolly's back...


Dolly's back all gone!


Bloggers.com

Bloggers - Meet Millions of Bloggers